Corridor Connections – improve the appearance of coaches
Ian Lamb
16th May 2020
5 minutes
Hornby and other manufacturer put in a great deal of effort to ensure that an appropriate model is as accurate as possible within the tooling process, and produced at a price that we can afford. But there are extra touches that make a real difference – including closing up the corridor connections so there is no gap.
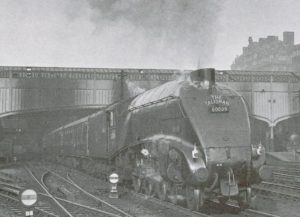
A 1960 scene showing the morning ‘The Talisman’ leaving Edinburgh Waverley for Kings Cross behind A4 Pacific 60009 “Union of South Africa” (c)Eric Treacy
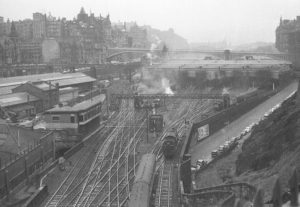
Above Calton Tunnel, Edinburgh Photo: Peter Elmslie
As a youngster sitting precariously on the wall above the Calton Tunnel portals at the southern approach to Edinburgh’s Waverley Station in the 1950s, it was always a great attraction to watch the famous expresses, particularly ‘The Talisman’ starting – or ending – their relevant journeys.
![]()
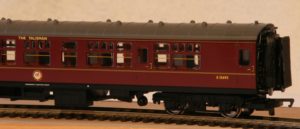
Recently I obtained the (R2569) ‘The Talisman’ Train Pack plus the (R4252) ‘The Talisman’ Coach Pack, This has provided a good opportunity to “super-detail” my collection to fully represent the morning ‘Talisman’ as I remember it.
The buffers on all my locomotives and rolling stock are painted in a steel colour, but on the ‘Talisman’ coaches I have applied ‘oily steel’ as this appears more realistic.
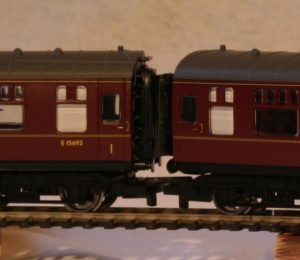
Such an overall attractive model without corridor connections is to me unthinkable, but it has been a long time since I made any. Nevertheless, corridor stock simply looks strange when hurtling round the track with gaping gaps from one coach to another! Goods traffic and suburban stock can be easily modelled realistically, but – unless you have large curves – you may be asking for derailment if you try to fit authentically modelled corridor connections.
So – as with most railway modelling in general – a compromise is required, and over the years I have used the following method to construct my own with reasonable success. Have a go yourself, and enjoy your railway modelling.
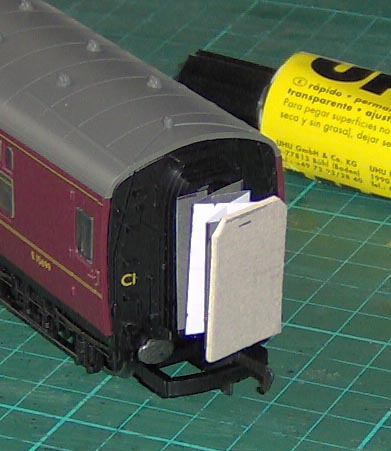
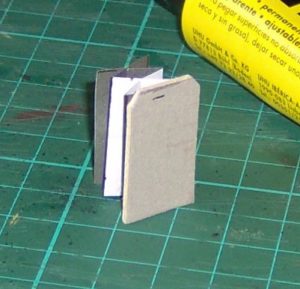
Tools and Materials – the photo below shows all you need – black paper, thick card, glue, scissors a ruler and some black enamel paint
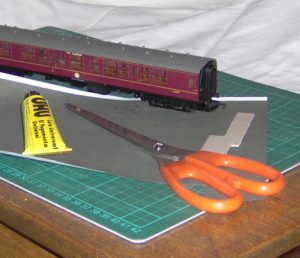
Anything thicker than normal A4 paper is prone to derail the coaches, especially at crossings or on bends. If you have no access to black paper, make your own. I simply scan black material and print on to scrap A4 size sheets. My preferred modelling adhesive is ‘UHU’ but it is very much a personal choice. A good pair of scissors completes the list!
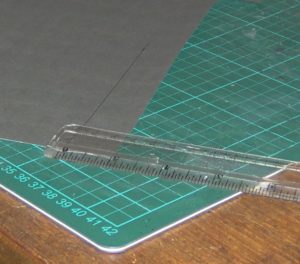
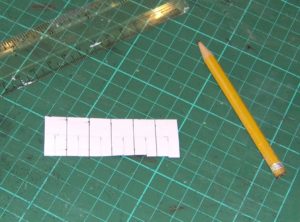
Mark out a 25mm wide strip, then turn the sheet 90 degrees and draw out six 12.5mm divisions to indicate the eventual folds which will give the concertina effect in the actual connections. At this stage I usually crease the folds because when the time comes to assemble the two it makes it easier to finally make up the connection.
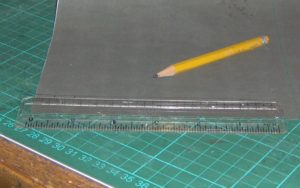
Cut out the strip, and turn it over if it is not already black coloured both sides. (I have kept one side white in order that the markings can be clearly seen.) Draw a line down the middle of the strip lengthwise; then on one side only of that line, divide each of the six divisions equally, cutting along each of these lines to the mid point of the overall strip.
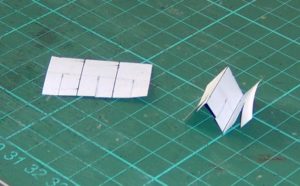
Cut the strip in two, and fold them to give a concertina effect, ensuring that each section is folded opposite to each other.
Now comes the ‘tricky’ bit! A lot of patience, trial and error is required to achieve the desired result. Once you have mastered the skill; corridor connections can then be made easily at will.
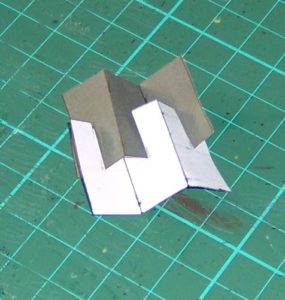
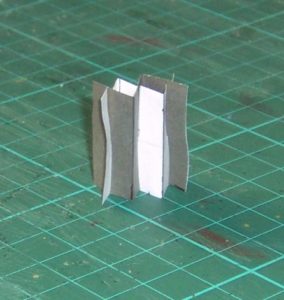
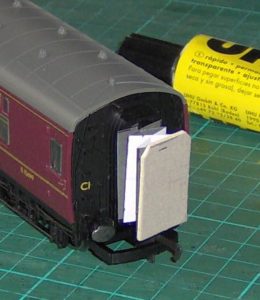
Locate and slowly push the respective sections together (don’t force – just persevere) until the complete concertina assembly is achieved. Cut a piece of thick card 27.5mm x 15mm, and ‘nick’ the top corners to give the correct shape of a corridor end board.
Put a thin film of glue onto the back of the end board, and simply stick it to one end of the concertina connection. Avoid pressure as it could end up with some glue being squeezed into the folds. A thin film of glue applied to the long edges of the coach corridor ends is all that is needed to secure the completed concertina connection.
It is advisable to have a ‘dry-run’ on a test track before painting. Alternatively make up a special test-track a I have done to determine the sharpest curves possible.

Water based paints tend to shrink or distort paper, so I prefer to use thinly applied matt black enamel. Additionally, when it dries, it gives a certain amount of strength to the paper without being too rigid which could cause derailment. Curves less than 2nd Radius may be OK for a tank engine with loose trucks or suburban coaches, but are likely to be too sharp for corridor connected vehicles.
Photos: Eric Dale
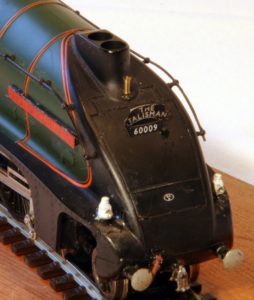
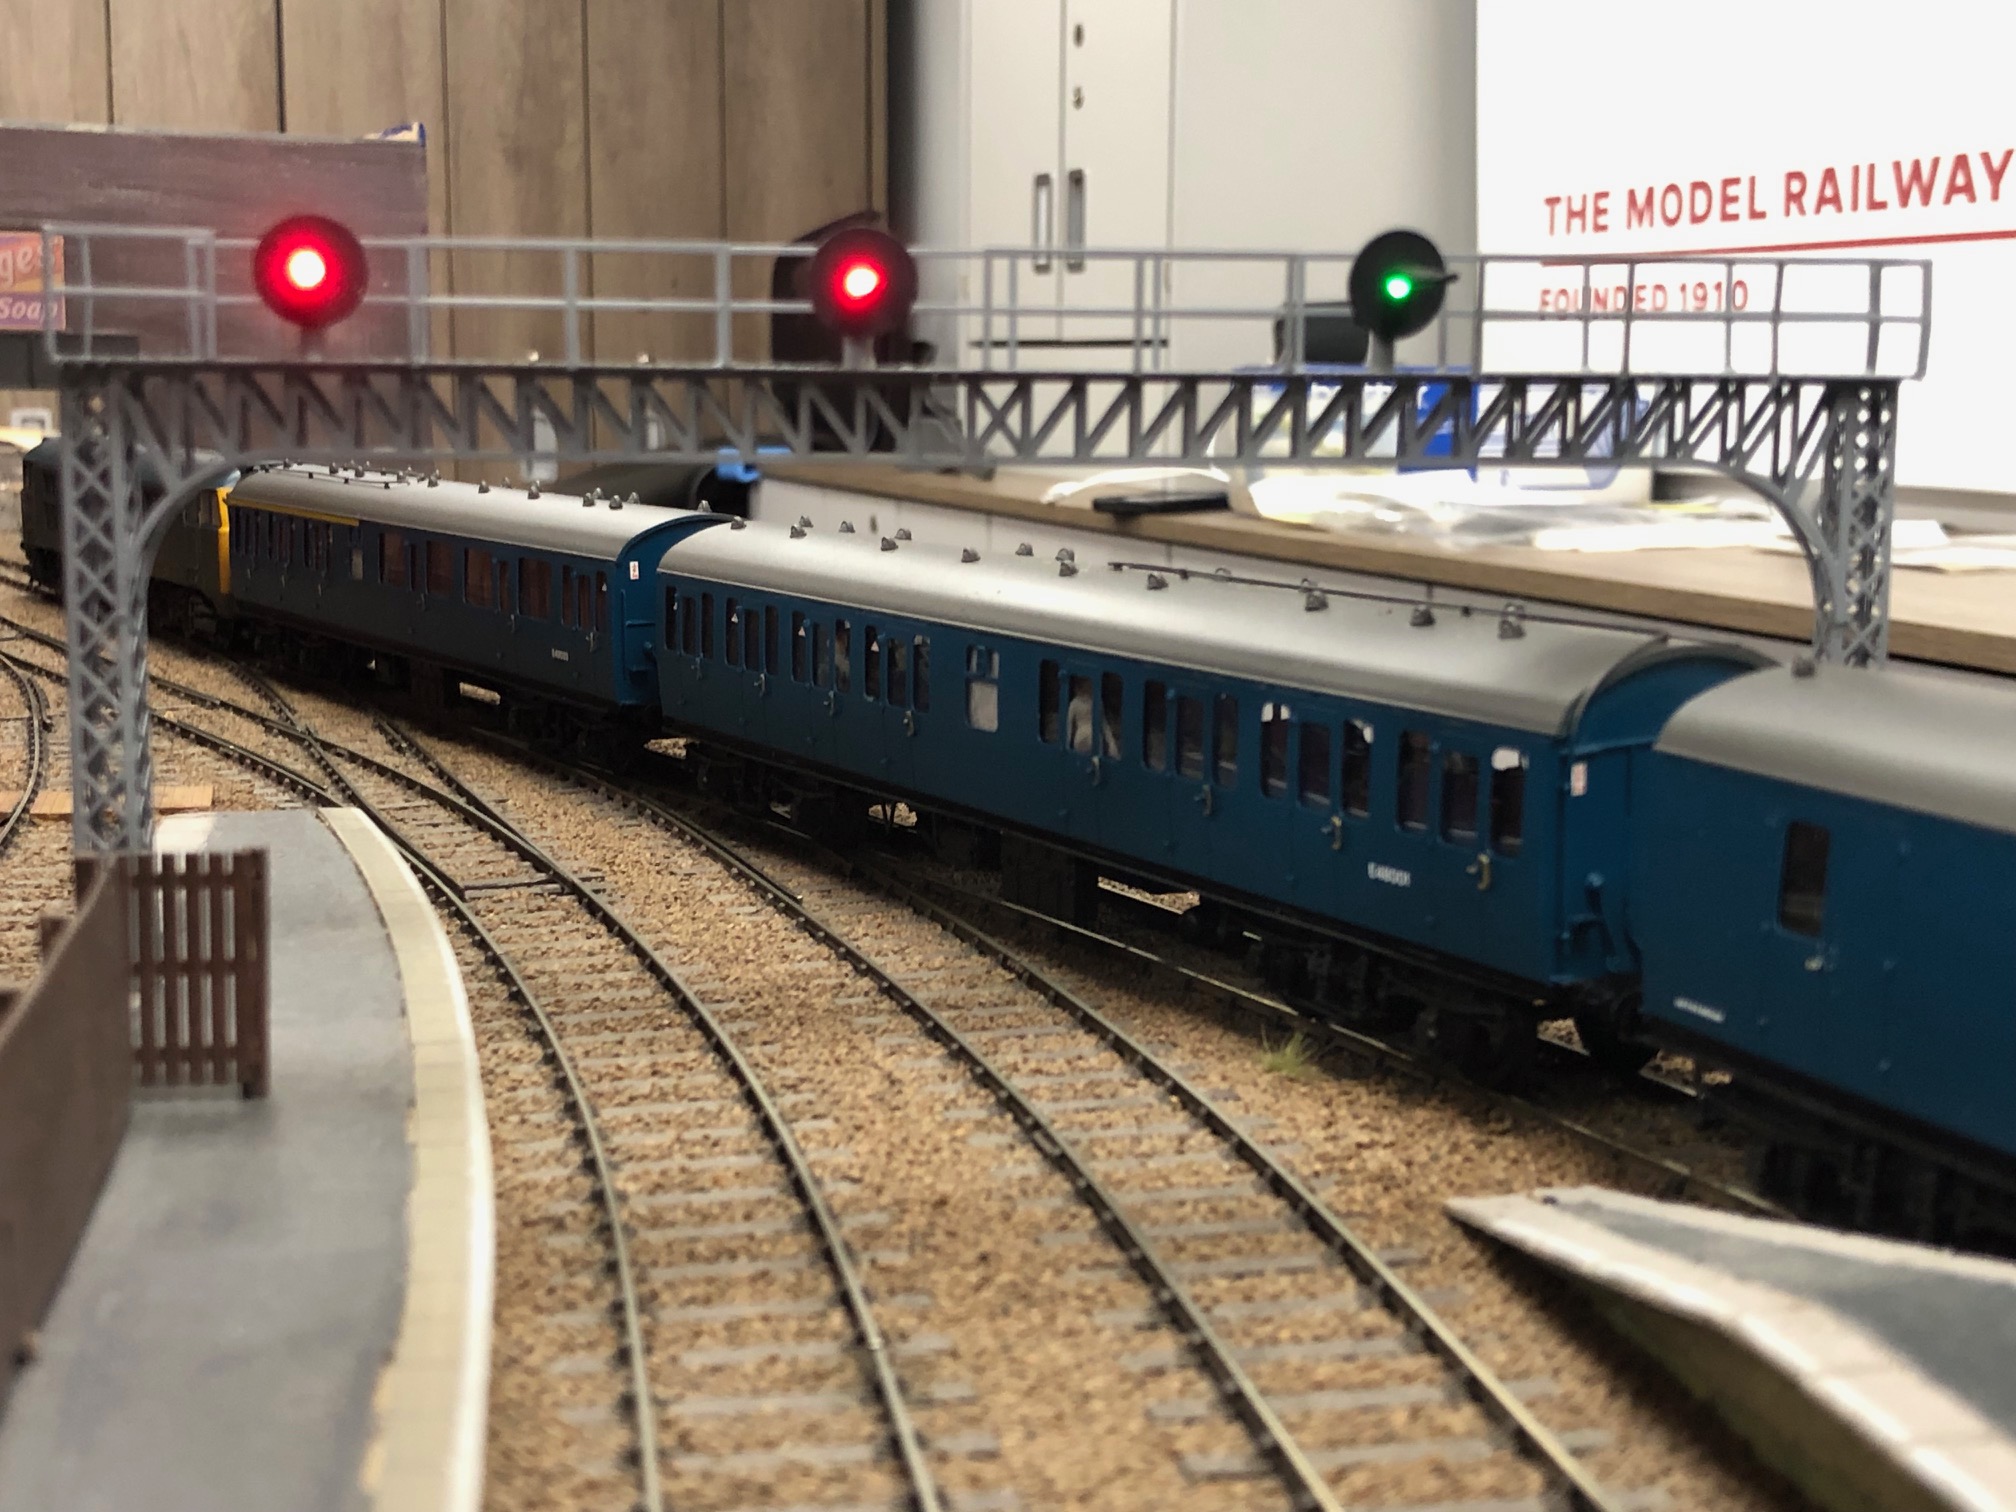
From an Edinburgh Haymarket based perception; it wouldn’t be “The Talisman’ without an ‘A4’ at its head; including through corridor connection. A properly located nameboard (provided with the train pack) sets the train off perfectly at the front.
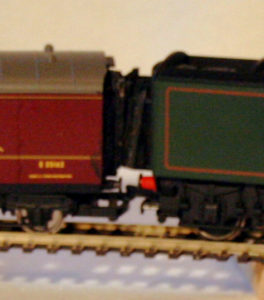
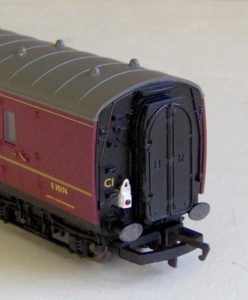
The final touch for all the work done so far is at the rear of the train where it is finished off with an appropriate tail lamp and corridor connection end boards.
All I need to do now is half close my eyes and cast my mind back to standing on the platform at Edinburgh’s Waverley station and watch the southbound ‘Up’ Morning ‘Talisman’ disappear in a cloud of smoke into the Calton Tunnel on its way to Kings Cross. Ah, such nostalgia!
Ian
You may also like...
Thursday Track Nights
We are open on Thursday evenings from 7pm to 9pm at our Keen House clubrooms. Visitors are welcome, please come along and introduce yourself.
Address:
Keen House, 4 Calshot Street, London, N1 9DA
Become a member