A Brighton Based ‘Gronk’ – Detailing an O gauge diesel
David Coasby
27th April 2020
7 minutes
The O gauge model of the Dapol Class 08 diesel electric loco finally arrived in the shops in December 2016 after lengthy production delays. Nearly everyone agreed this was an excellent model and at a bargain price, though as always there were one or two out there who find fault with any RTRmodel.
I had pre-ordered a DCC sound fitted version in early BR livery of black, but un-numbered, as I wanted to personalise my loco. However when it arrived it was numbered 13240, which in its early days was shedded at York. I wanted a prototype that was seen at the other end of the country – Brighton. When I enquired from Tower Models why I had been sent a numbered model they told me Dapol produced very few un-numbered models in black, so I had no option but to accept it (more unnumbered ones have since become available). Anyway, I thought the model really captured the look of the real thing and I was extremely pleased with the running quality of the model. The sound too is very good, with recordings made from a Class 08 on the Dean Forest Railway.
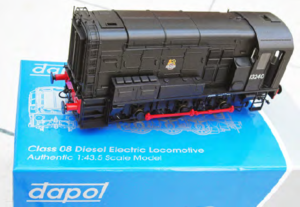
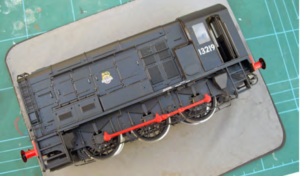
The model as it comes out of the box – black, red and shiny
I now had to choose a suitable running number. Research showed that 13219 had originally gone to Norwood Junction, but in 1959 was based around the Brighton area and still retained its original black livery. This is how I remember them from my train spotting days, so I wanted my model to reflect this period. I’ve changed model loco numbers before, but not any produced by Dapol (fortunately the Dapol Terrier I had purchased previously had a suitable number). My first thought was to change just the last two digits (40 to 19) but two things put me off this decision. By substituting a 1 for a 4 (which is wider) the new running number of 13219 would appear off centre. Secondly, I doubted very much if I could match exactly the Dapol lettering with any transfers I could obtain. So I decided to remove all trace of 13240 on both sides of the loco and replace them with some Fox Transfers diesel numerals.
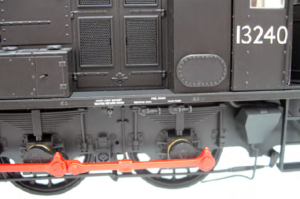
A close up of the detail
This was achieved with the tried and tested method I’d used before. With a brand new 10A scalpel blade inserted into my trusty old Swan Morton handle I very gently scraped away at the numbers, holding the knife at a very shallow angle so as not to dig into the plastic moulding of the cab side. Dapol’s lettering was superbly applied and I have to say very durable too, as it took a long time to make any kind of impression with my very sharp knife. But with a little patience gradually the printed numerals began to disappear. It’s at this point you realise there was no going back! Using this method you do end up with very slight markings on the cab side, but more about that later.
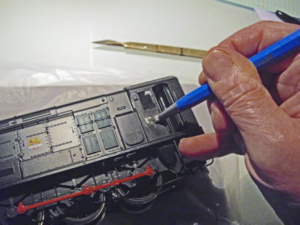
Removing the cabside umbers with a fibreglass pen. The tool for the other method, a sharp knife, can also be seen.
Out of interest I tried a different method when removing the lettering on the opposite side. I used a fibreglass pen and have to admit it was probably a little quicker using this method, but it still left slight markings where the fibreglass pen had been rubbing. Fox Transfers don’t like being applied to matt surfaces. They will stick, but the thin transparent film around the edges of the lettering tends to show when they dry. The trick is to apply a little gloss varnish, in this case using Halfords Clear Lacquer, to the surface where you are going to apply the transfers. But it is vital you mask off the rest of the loco, just leaving the cab side area to take the spray. Shake the can for several minutes before you use it, and practice your spray first on an old piece of cardboard or whatever you have hanging about. You will find the spray from the aerosol is quite forceful, so take care. Once you’re familiar with its behaviour begin to spray your model, but make sure you are not too close As a rule of thumb when using aerosols I tend to hold the can about 15” from the model. Make a very brief fine ‘dusting’ and let it dry for about 15 minutes, then give it another coat. There’s no need to overdo it, you are just creating a surface that the transfers will accept. Put aside to dry thoroughly and cover with an old cardboard box or similar so no dust sticks to the lacquer and remember to upturn the spray can and give a few seconds blast to clear the nozzle so that the lacquer doesn’t set hard in it and you can use it again in the future.
Fortunately I already had a good selection of Fox Transfers in stock. I ignored the diesel numbering sheets (with the ‘D’ prefix), as early diesels normally used the same style as steam locos. Fox’s 5.5mm (scale 9”) lettering from sheet number FRH7008 – British Railways steam numbering off-white (straw) appeared to be a reasonable match to what Dapol had applied. However, I noticed that although the numbers where the right height they appeared thicker than what Dapol had applied and had I used that size they would not have fitted comfortably across the width of the cab. So I chose the next available size down on the sheet, which was 4.8mm (scale 8”), these fitted OK. I always apply the middle numeral first, in that way you get the 5 digits centred nicely on the width of the cab, but remember if you have any 1’s in your proposed number then make allowance for these, as they won’t take up so much width. When I was satisfied that the numerals all aligned nicely I set the model aside to dry overnight. As the masking tape was still in place I gave a light dusting of Halfords Matt Lacquer over the transfers to take away the shiny look to the cab sides caused by the previous gloss varnish and seal the transfers in place. Once again it is necessary to allow this to dry thoroughly.
The new number has been applied, but the model is still in almost pristine condition.
I had previously removed the chassis from the body following Dapol’s instructions – a bit tricky but as long as you are careful and don’t rush it all will be well. I weathered the chassis with a paintbrush using my favourite ‘gunge’ colours (Humbrol 66 and 98 with some dabs of Railmatch Brake Dust; Frame Dirt and Track Colour) and once again set aside to dry. With paint inevitably getting where it shouldn’t go I spent several minutes manually turning the flywheel to rotate the wheels so they could be wiped with a cotton bud, which had been dipped in a little cellulose thinners. This is a really good way at getting rid of any enamel paint from the tyres of your loco, but be really careful not to let the thinners get anywhere else as it can easily ruin a paint job and also melt plastic.
The loco body then received my attention. Firstly I masked off all the windows with masking tape. The trick here is to place an oversize piece of tape over the window, then with a sharp pencil feel for the edge or the window and score it all the way round. Using your pencil line as a guide it’s then an easy job to lightly cut round on this line using a sharp scalpel and peel away the unwanted tape.
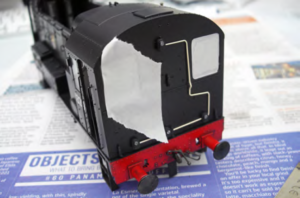
Blanking the windows with masking tape before weathering the loco. On the left, one of the windows has the oversize piece of masking tape in place, while the other has been trimmed to size.
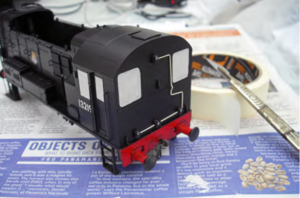
Trimmed, the loco body now ready for some serious weathering.
I then used a brush to apply some weathering colours, stirred thoroughly and very diluted with white spirit. Once dry I applied some more weathering using my airbrush, with blacker colours nearer to the top (emulating exhaust smoke) and browner colours such as track colour lower down, where muck from the permanent way would stick to the bodywork. All was then set aside to dry thoroughly.
The body was replaced onto the chassis and a few other weathering colours were lightly sprayed over the whole model, harmonising the colours between the two components. All this work helped disguise the scraping marks I made when I removed the original number. Once again it’s important to set aside to dry or you can accelerate this process with a hair dryer, but don’t get it too close to the model or it might bend or melt the plastic. After removing the masking tape I dabbed a little weathering powder here and there to give the finishing touch.
The basic weathering has been applied and the masking tape over the windows is removed, prior to final detailed weathering with powders.
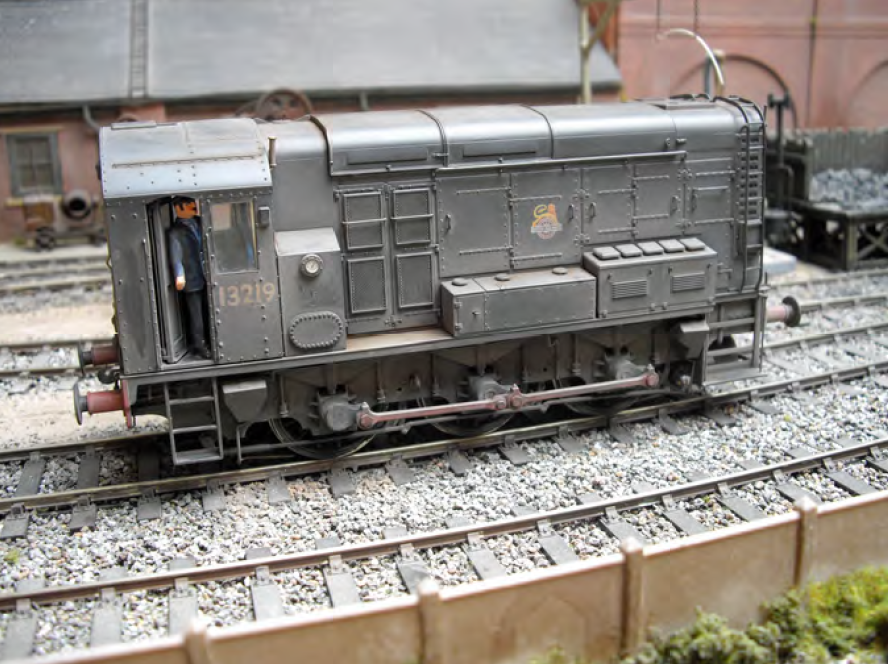
13219 looked just the way I wanted. Basically having out-worn its original coat of black paint and waiting to go to the paint shop at Eastleigh where they would paint her BR diesel green and apply the newer style logo. As a postscript I found coupling up the 3-link couplings just too difficult with all those beautifully modelled pipes getting in the way, so I have subsequently removed these from below the buffer beams.
Dave C
This article first appeared in Bulletin 497. An archive of recent Bulletins is available online in the members’ area of the website.
For details of membership, click here
You may also like...
Thursday Track Nights
We are open on Thursday evenings from 7pm to 9pm at our Keen House clubrooms. Visitors are welcome, please come along and introduce yourself.
Address:
Keen House, 4 Calshot Street, London, N1 9DA
Become a member