Class 20 conversion to EM – with Gibson wheels
Tom Cunnington
12th July 2020
4 minutes

In the latest of the blogs on straight forward conversions of OO to EM gauge, this is a conversion of a Class 20 using the Alan Gibson pack of wheels and new axles -available direct or via the EM Gauge Society.
The conversion pack is suitable for the Bachmann Class 20 & 25 and the Heljan Hymek & Class 33 and come with 8 x EM wheels and 4 x 2mm axles. Unlike the Ultrascale version, the wheels are supplied flat-packed and need to be assembled and reuse the gear from the original loco. However the lead time are rather less, and this pack is about 2/3 of the price.
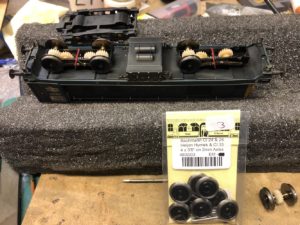
As usual the first stage it to remove the keeper plate on the bottom of the bogie. The clips are fairly easy to identify, and need easy off with a small screwdriver. The existing axles simply unclip – above is the first axle out next to the new pack. To remove the gear from the axle, means removing a wheel. I keep the supplied wheels in case I ever want to sell the loco, so take care when removing them. Here I used the GW Models gear puller to firstly remove one wheel, and then the gear. This is much more even than trying to use a vice or pair of pliers, although both can work this gear puller provides a much more even force. The new axle and a wheel are on the right.

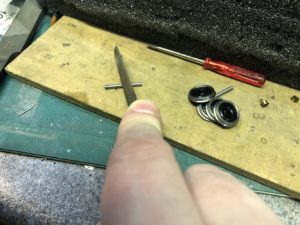
The new axle is just the right size and length, but before fitting it needs a small modification to help ensure the gear wheel has more friction and really wont move, and the simplest way is to doe as shown here, and rotate the middle of the axle with a file. That rough up the surface just enough to provide a better friction fit.
The Alan Gibson axles are normally pretty clean cut, but I added the very slightest of a chamfer to the ends of the axles with a file to make it easier to slide the wheel on. I take care to make sure the chamfer is only a very slight one so maximise the contact between wheel and axle. The gear is central on these axle, so I slid that on first and made sure it was central – it doesn’t have to be spot on but the closer the better. Then with the outer edge of a wheel on a flat surface the axle goes into the back of the wheel trying to keep it as vertical as possible.
I have a very small hammer that is ideal for just tapping it in. With the right length axle, it should align in the right place flush with the outside face of the wheel. Getting it right first time means a good tight fit bertween the plastic wheel centre and the axle. If I have to remove it for any reason, I use some Loctite to reinforce the friction fit.
I did the same with the other wheel, but using a back to back gauge (or Vernier gauge) to make sure the back to back is 16.5mm. I then roll it along a surface to make sure both wheels are true.
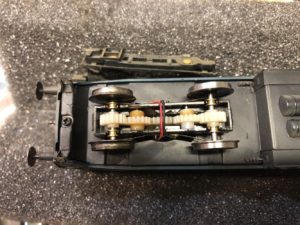
The picture above shows an original axle on the left, and a new one on the right, back in the bogie. The pickups are reusable and on this one didn’t need adjustment – however I used a pair of tweezers just to hold them in enough to avoid any damage as the wheel slipped past (shown in the Class 101 conversion blog) and clip into place.
There was enough grease in the existing gears, especially having taken care with the changing of the gears to keep most of the grease on the gear rather than my hands. If it looks dry now is a good time to add a little gear grease.
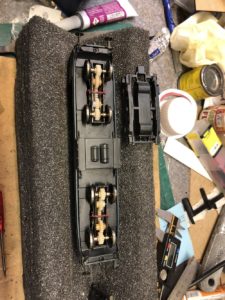
The final stages are to reattach the keeper plates, and give the loco a test run.
You may also like...
Thursday Track Nights
We are open on Thursday evenings from 7pm to 9pm at our Keen House clubrooms. Visitors are welcome, please come along and introduce yourself.
Address:
Keen House, 4 Calshot Street, London, N1 9DA
Become a member