Regauging a Replica chassis to EM
Tom Cunnington
27th June 2020
4 minutes
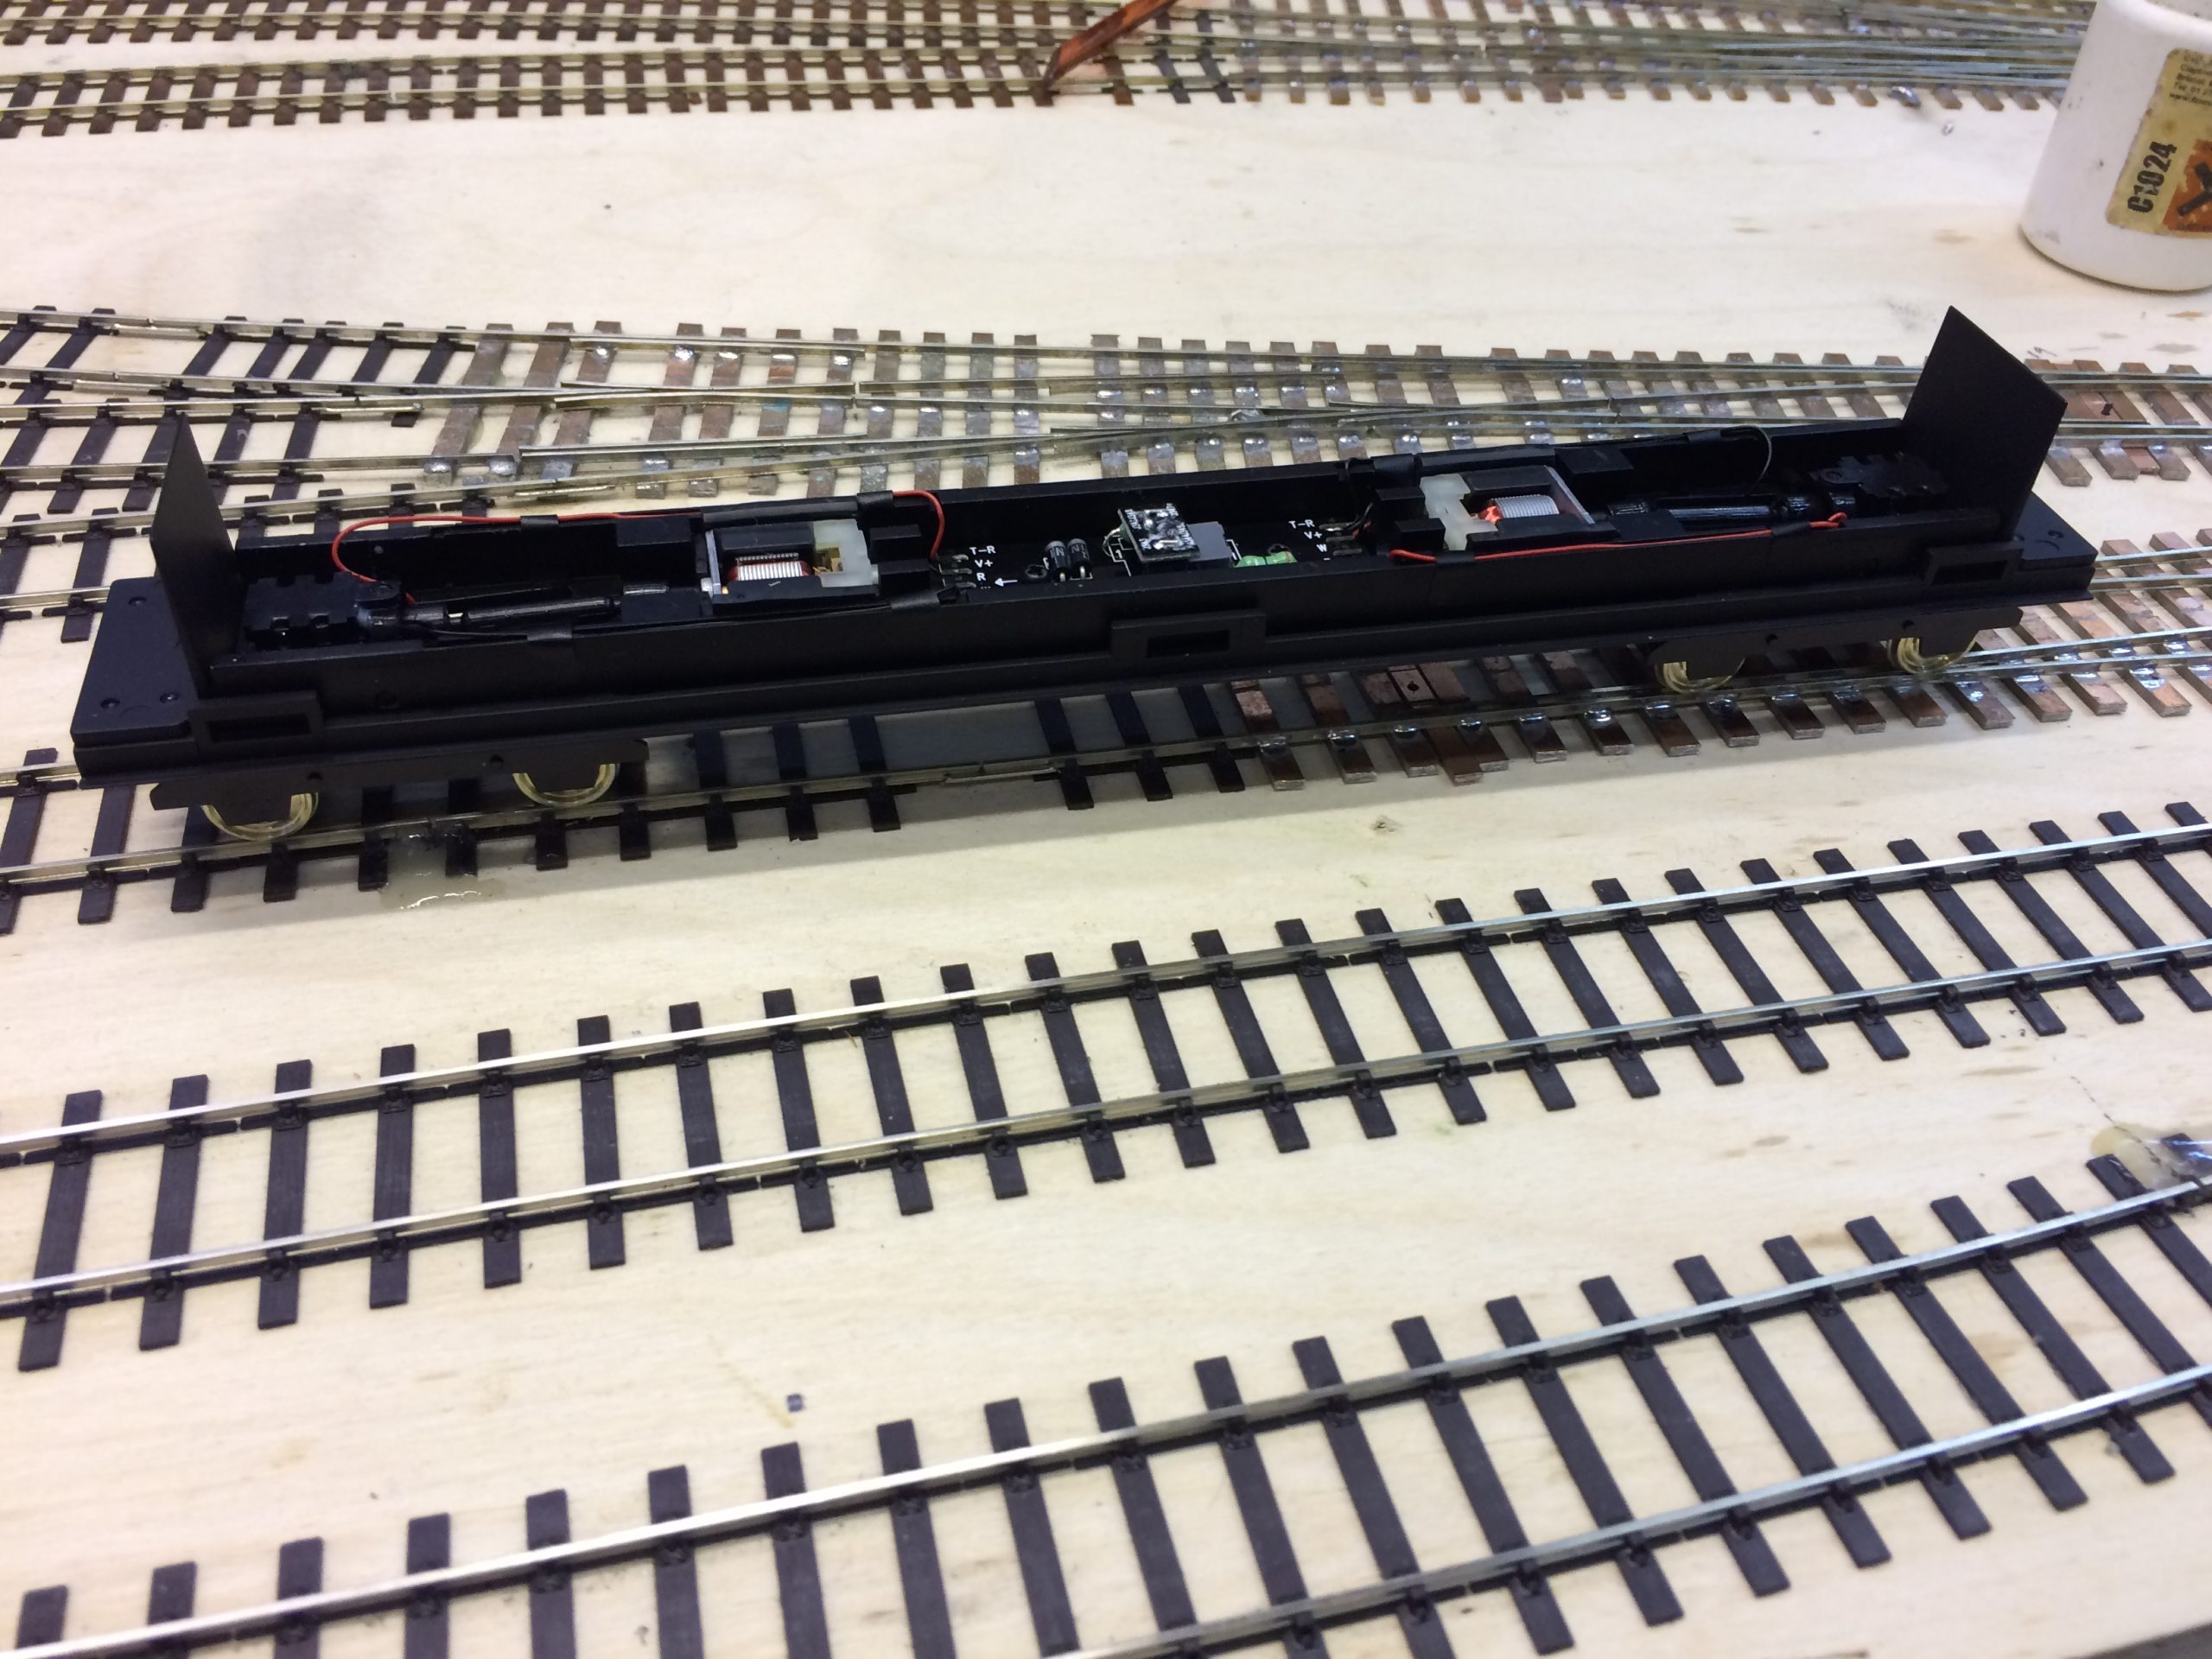
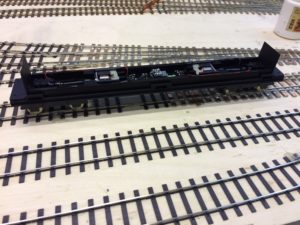
The Replica Railways powered chassis is a good product, that makes building EMU and DMU kits much easier, with a good motor and drive system picking up from and powering all 8 wheels. It could be used for example on the MLV and Class 455 projects Chris has described. It come as three options, with lengths and wheel sizes to suit almost all UK multiple unit options. A low centrally mounted motor drives both bogies, with all the mechanics designed it fit in the space between the floor and the bottom of the windows so it is disguised by the coach it is in. For obvious reasons it is supplied in OO gauge, and this describes how I did the relatively simple conversion to EM gauge, using DCC Concepts wheels.
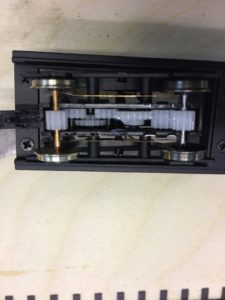
As usual, I tested the unit first on the Club test tracks to double check it worked and run the motor in a bit. The next thing is to look at the existing wheel, and see how they are mounted. The base simply unclips to reveal the gears. This shows the underside of the bogie, with a new wheel set on the left, and the original on the right. The axles are held in place by plastic clips, and simply pull out with some gentle force.
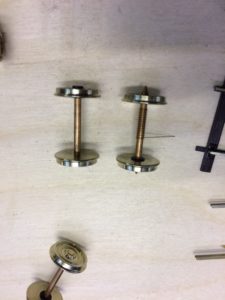
The axle diameter is fine, as is the overall clearance for the new wheel, but most obvious wheel sets (Black Beetle work just as well) come with pin point axle ends that need to be taken off. It’s not worth cutting them off, so I use a file or more often the mini drill with an abrasive wheel. If using the latter, then it’s important to do it gradually so that the metal and plastic don’t overheat. In both cases, care is needed to not accidently damage the wheel face. This picture shows the wheel as supplied on the right, and filed back on the left. The extra coil of wire on the new wheelset of to enable it to be used for pickups on coaches where there is no existing pickup, and is simple bulled off for this project as the existing pickups can be adjusted.
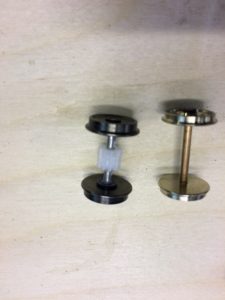
The next picture compares the old and new wheels in more detail. You can see here that the wheel as supplied is too deep, and can’t simply be pulled out on the axle. The next stage is to transfer the gear drive from one to the other. The simplest way is to use an axle puller to take the wheel of the the end of each of the wheel sets and then gently. I use the GW models wheel-puller, but pliers or a vice would work as long even pressure is applied so as not to distort the gear.
The trick next is to rough up the middle of the axle – using a couple of strokes with a course file or impressions with pliers – to ensure the gear and axle engage. I slid the gear squarely onto the new axle to about the mid point. I have have marked one edge of a back-to-back gauge with a centre mark to help me get the gear in the right place – easy in this case as the gears should be central. When It’s lined up, the other wheel is slid back into place using the back-to-back gauge to check it’s in place and square.
With that done, I did a quick roll along the workbench to make sure the wheelset is all still square, and then was ready to put the new wheel into the bogie. The pickups are reusable and on this one didn’t need much adjustment – however I used a pair of tweezers just to hold them in enough to avoid any damage as the wheel slipped past (shown in the Class 101 conversion blog) and clip into place – as you can see in the first picture.
A quick run on the rolling road, and then as the layout was up a blast around the fiddle yard confirmed it worked.
Now it is working, I need to find dummy body sides and underframe detail, and sort out the body to go on top of it.
You may also like...
Thursday Track Nights
We are open on Thursday evenings from 7pm to 9pm at our Keen House clubrooms. Visitors are welcome, please come along and introduce yourself.
Address:
Keen House, 4 Calshot Street, London, N1 9DA
Become a member