Sarum Road – Part 2
Michael Joseph
21st May 2020
5 minutes

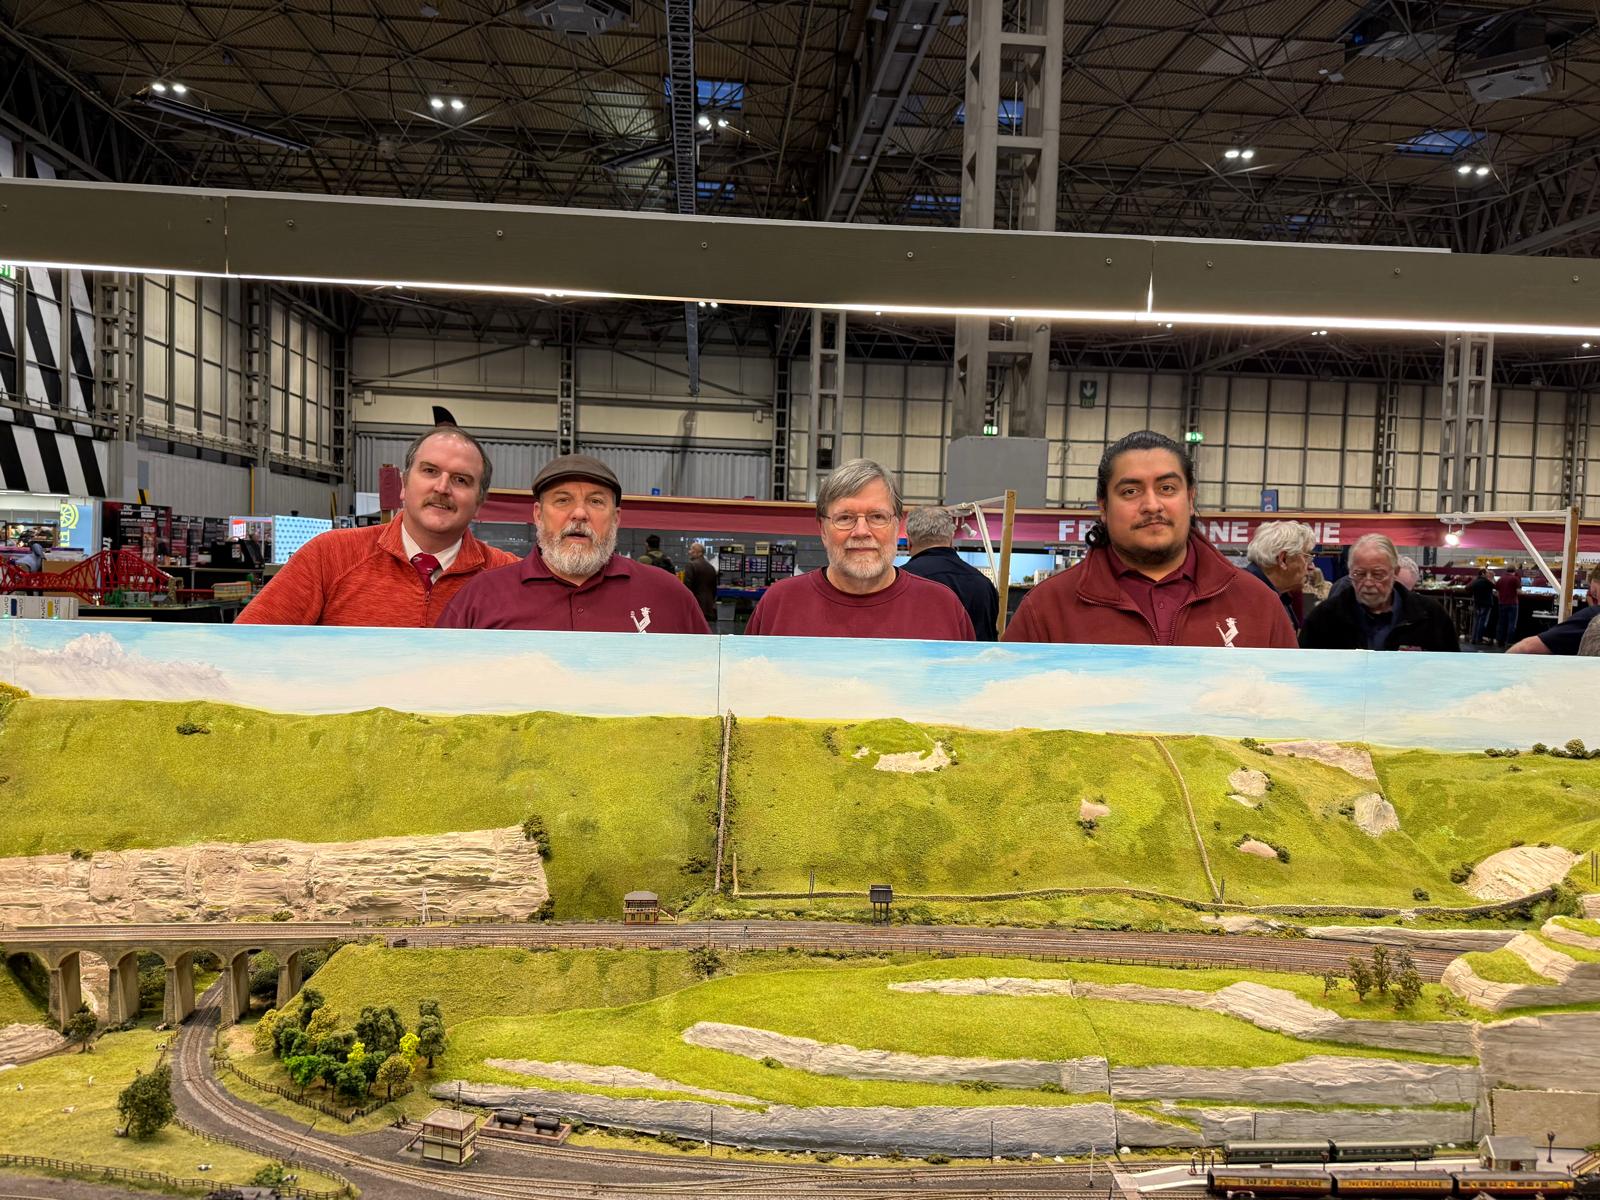
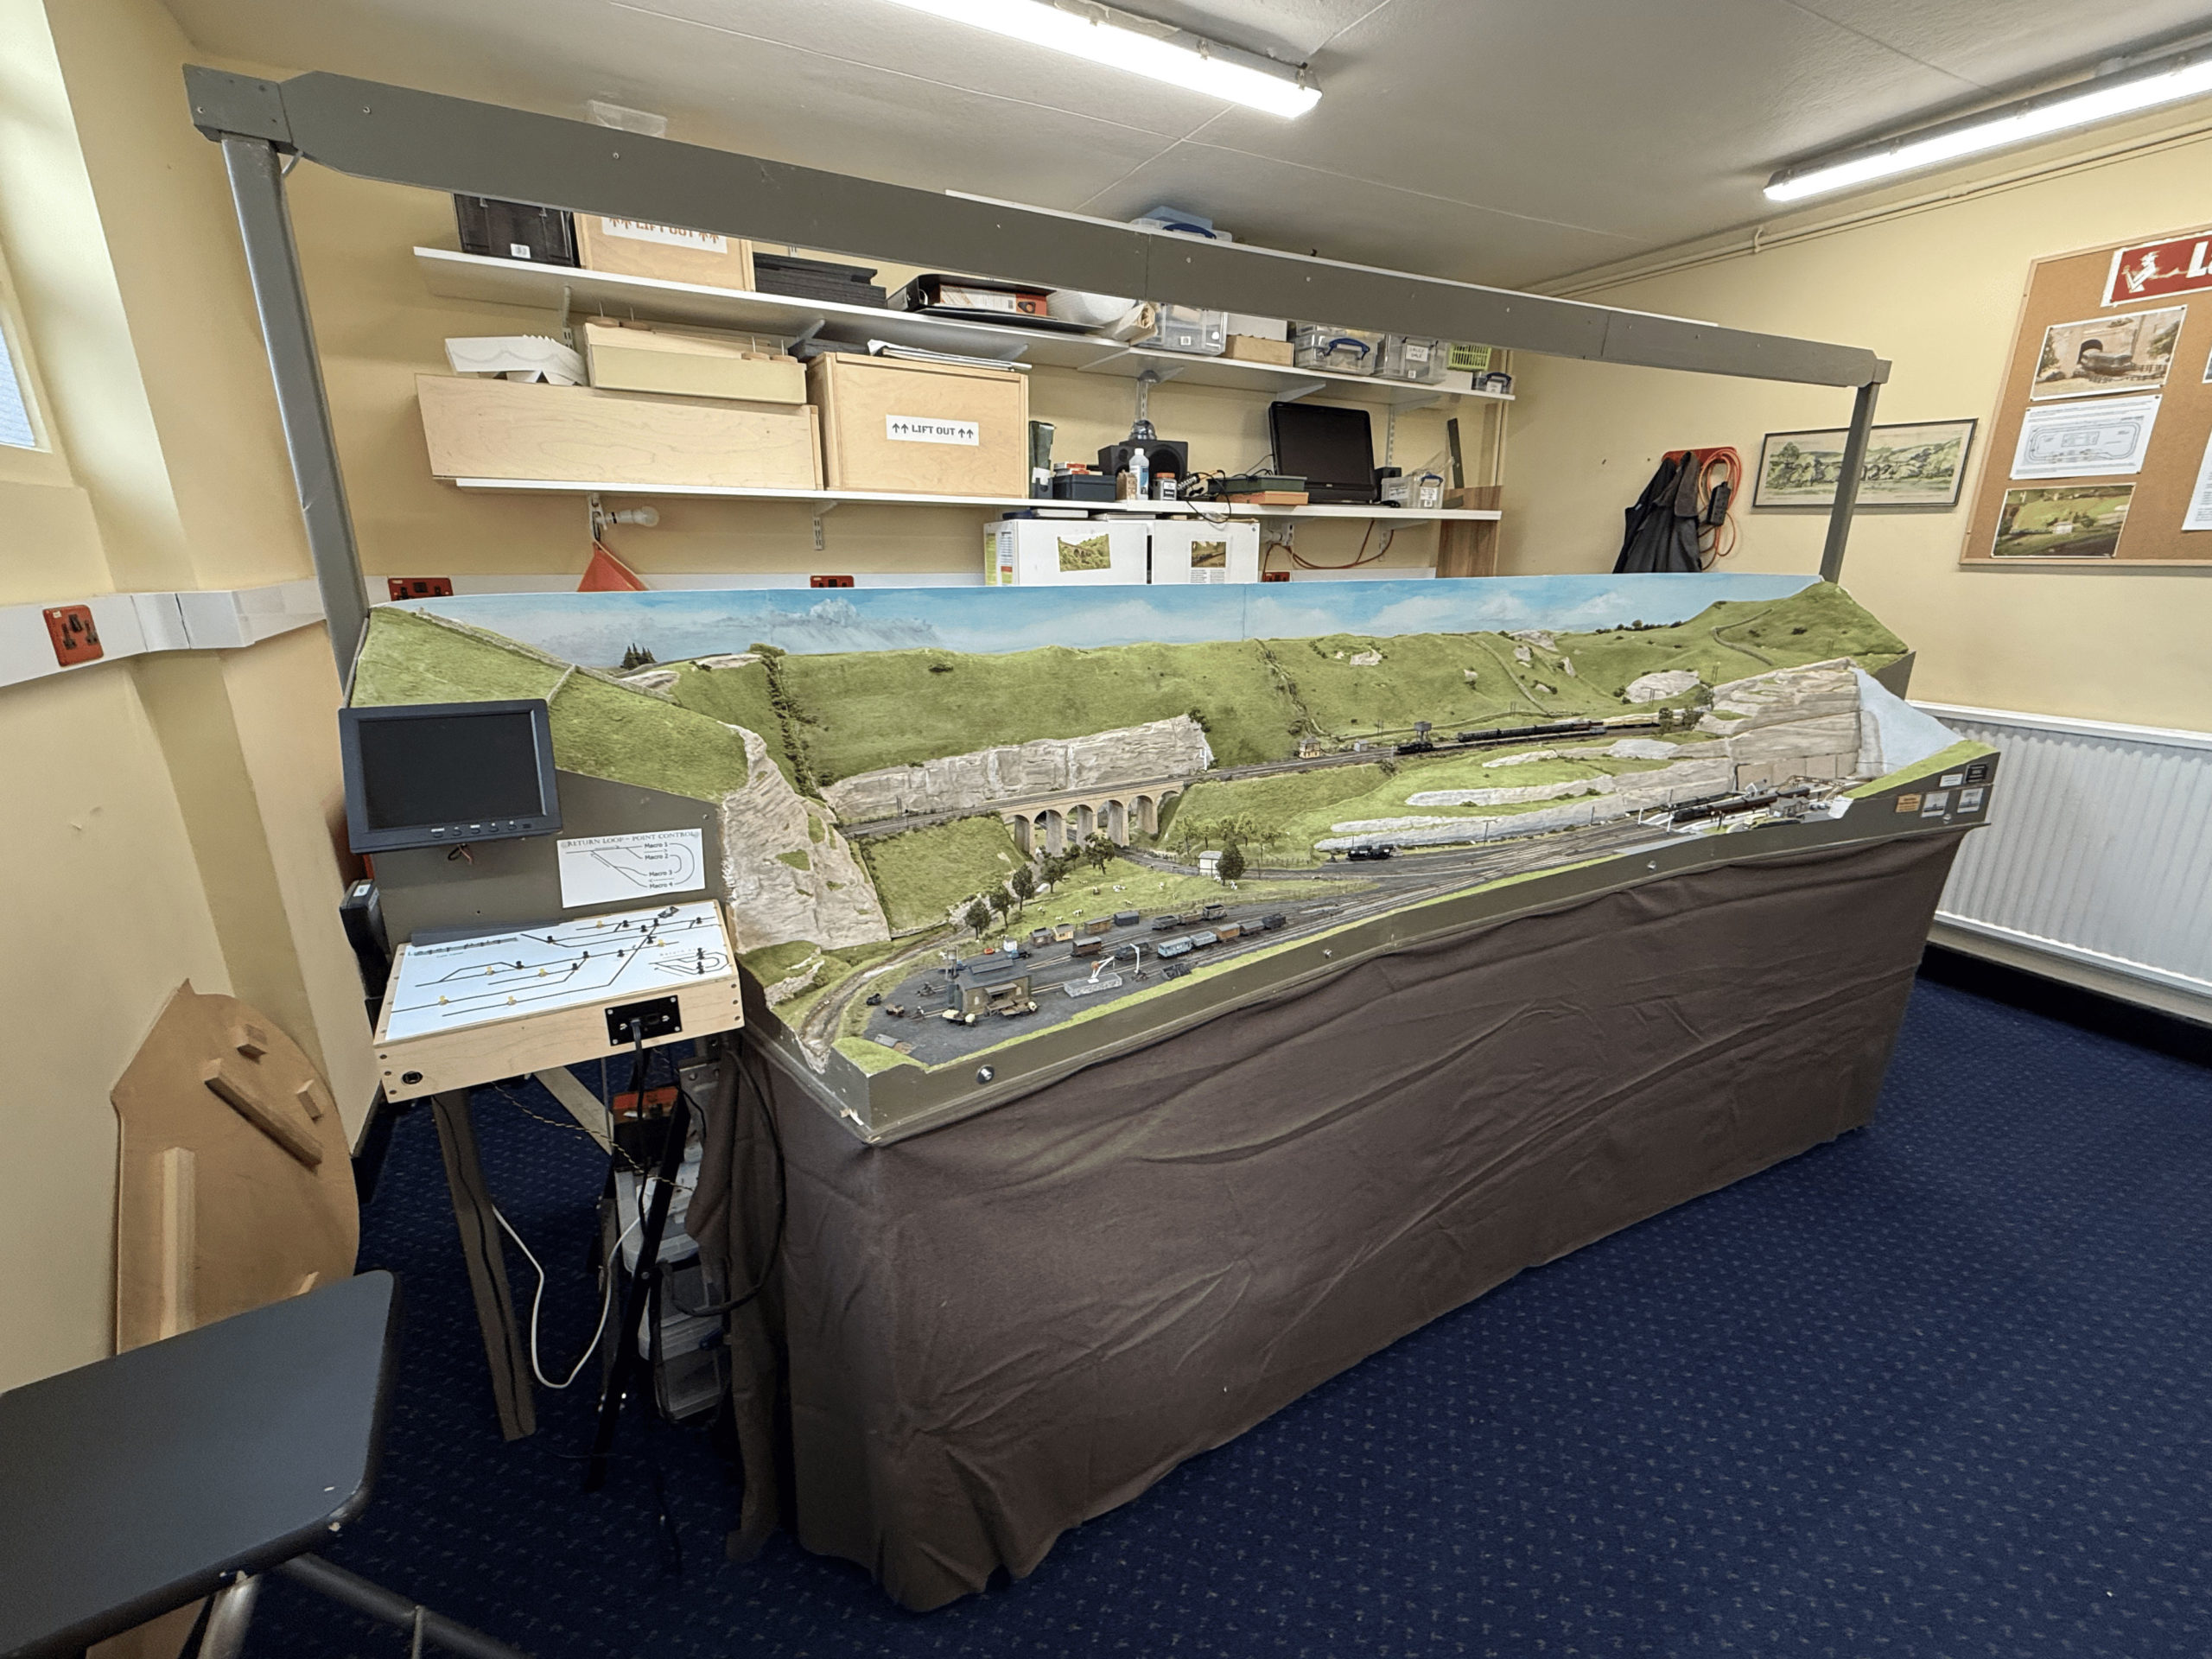
Jumping the gun a bit – here are the completed baseboards and legs.
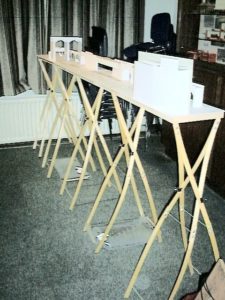

The legs are ballasted with camping water bottles! The white structures on top are dummies for the viaducts, etc to be built.
Tools
- The tools used (so far) have been:
- Tape measure
- Carpenter’s marking gauge
- Bradawl
- Modeller’s knife
- Straight edges 3′ and 1′
- Smoothing plane (7″)
- Screwdriver
- Staple gun & staples 10mm size
- Electric drill (because I can be lazy!)
- Workmate
Materials
- 5′ x 5′ by 3mm birch ply – and yes, it is ordered in mixed units, (suppliers listed below)
- PVA glue
- 6 x A1 sheets of card for the mock up
- Cutting List and Materials (21Kb spreadsheet)
Construction
The 3mm plywood was obtained from Arnold Laver & Co. (see below), two sheets of 5′ by 5′ birch three ply (152 cm square). These were cut in half across the grain to make handling easier and because the longest piece required was less than 2′ 6″ (76 cm).
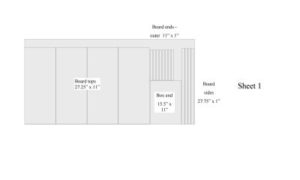
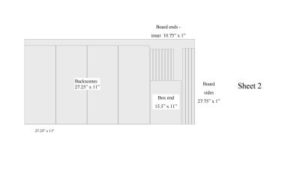
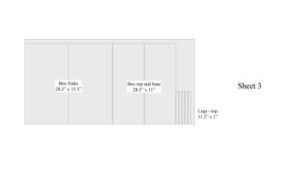
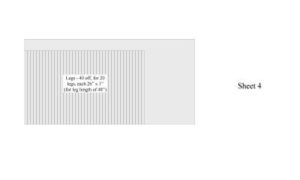
A cutting plan (see diagram 3a,b,c and d) was put together to make the most of the sheets of ply. This was immediately ditched when it was found the ply had what appeared to be knot holes filled with a fillet of wood. This was an important discovery since it significantly affected the strength of any of the thin pieces cut for the legs or the boards. (What actually happened was that I cut an experimental piece and then started flexing it to see if the ideas for the legs might work and by a piece of very good fortune I had chosen a section with a knot hole!). Boards were examined both sides for the tell-tale sign of an ellipse and were marked on both sides so that they could be avoided. The legs were cut first and at a knot hole the larger boards or backscenes, etc were cut. Nevertheless, the cutting guide was useful to prevent excessive waste. Cutting the legs etc was done using a carpenters marking gauge set at one inch and scoring lightly and then more heavily until the cross grain was being scored – the gauge made a much harsher noise. Care is needed to prevent the gauge point following the grain. The exercise was then repeated on the other side and the ply can then be snapped, rather like plasticard. The edges need cleaning up with a bit of sandpaper. Occasionally the edge of the ply sheet needed tidying up with the plane to keep the edge straight and square.
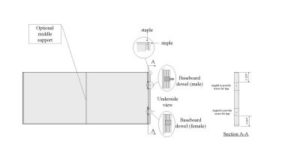
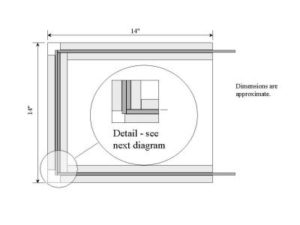
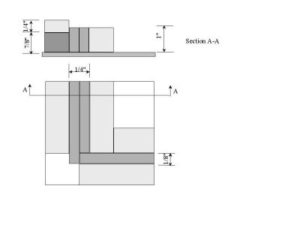
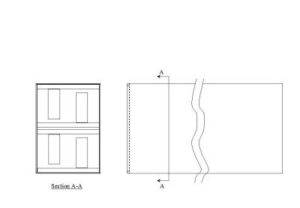
The board design is very simple, one flat top, height when needed to be built up using cork or balsa, (the latter stabilised with a dilute coating of PVA). The boards are, (excluding dowels), 27″ x 11″ x 1.125″ (68.6 x 27.9 x 2.9 cm); the sides and ends are only 1″ (2.54 cm) deep. The ends are double thickness ply and rebated, (see drawing), to provide extra support. Because pattern makers dowels are 1″ in diameter (2.5 cm), the same as the board depth, they could not be used and so Red Dogs’ baseboard dowels were bought instead. After construction of one board, it was found that there is plenty of longitudinal stability, but that it does flex slightly along the diagonals. The end thickness had to be built up using two extra pieces of ply, cut at an angle on one end to allow space for the legs and a third piece to complete the recess so that the tops of the legs sit snugly under the board. (If you look closely at board D, you will find that it does not have this feature since the penny dropped after I had assembled the board!).
A jig was built to accurately align the board and sides prior to glueing and stapling. The sides and ends are glued in the jig and then stapled. The staples (10mm) are almost flush in the board, but can be gently tapped in using a hammer. (Again, the stapling was tried out on pieces of scrap before serious work was started). The stapler casing is 1mm thick at the (dangerous) end and so are the staples (luckily!). Therefore with a block of wood butted up against the side the staple went exactly through the middle layer of the 3-ply. The ends of the jig were carefully fitted to provide the right amount of offset for stapling. A couple of holes were drilled through to lever up the baseboard once stapled using a small screwdriver.
Storage
The boards are stored ‘nose to tail’ in the box, the inverted pair (the end boards) sliding in on a piece of aluminium L-shaped section (Homebase). The backscenes are stored between the boards whilst the clips, cables, etc are stored in the traverser board (A) and the legs in the other (D).
Leg Design
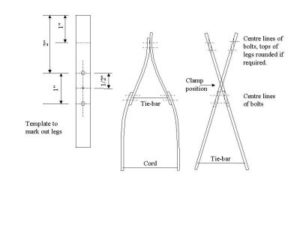
The legs are intended to form a stressed structure roughly in the shape of a letter A. Two of these, crossed and clamped at about the middle form one ‘trestle’. The lack of weight is compensated for by a flexible campers water bottle, filled, to provide stability at the base. The legs are designed to fold, 10 legs to fit conveniently into one baseboard. The ends of the legs were rounded off at the top so that they could fit into a recess on the underside of the boards. The legs are bolted together permanently at the top, folding in the middle for transport. The sides and edges were sanded to a rounded finish to inhibit splintering of the ply. (Safety Note: Use a sanding block to do this, I did not and got the biggest splinter I have ever had… it hurt… oh it hurt!). All wooden surfaces were sealed with a coat of boiled linseed oil.
References
Locomotive Engineers’ Pocket Book 1933, published by The Locomotive Publishing Co Ltd.
Bridges for Modellers by L.V. Wood, 1985, published by OPC (ISBN 0-86093-226-5).
Suppliers (Usual disclaimers apply)
Plywood: Arnold Laver & Co. Ltd, Basingstoke Road, Reading RG2 0QN 0118 930 4777
Card: Any reasonable stationers, I used Office World.
Staplegun & staples: Homebase.
Baseboard joiners: Red Dog Model Railways 9, Harcourt Bradwell, Milton Keynes, MK13 9EN
Guttering bolts, etc Homebase or building suppliers
You can read other instalments here: Part 1, Part 3
You may also like...
Thursday Track Nights
We are open on Thursday evenings from 7pm to 9pm at our Keen House clubrooms. Visitors are welcome, please come along and introduce yourself.
Address:
Keen House, 4 Calshot Street, London, N1 9DA
Become a member